

Edit
Delete


Rubber Band Cars
Sections
Challenge Areas
Scout Method Elements
SPICES Growth Areas
The Adventure
Harness the power of a rubber band to make a toy car go vroom.
Plan
- Investigate energy including its fundamental principles and some different types of energy, particularly potential energy and kinetic energy.
- Investigate the properties of elastic bands.
- Read the safety information and discuss with your leaders or another appropriate adult what safety equipment, precautions, and supervision may be required. Ensure that you have these safety measures in place before starting the ‘Do’ section.
- Gather all the equipment that you need to make your rubber band car. You will need the following equipment: two paddle pop sticks, a straw, 4 bottle caps of the same height, 2 skewer segments of approximately 2 cm each, 2 skewers segments approximately 10 cm long, 3 rubber bands (ideally two small, and one big), a pair of scissors, a nail, a hammer, a hot glue gun, and hot glue gun sticks.
Do
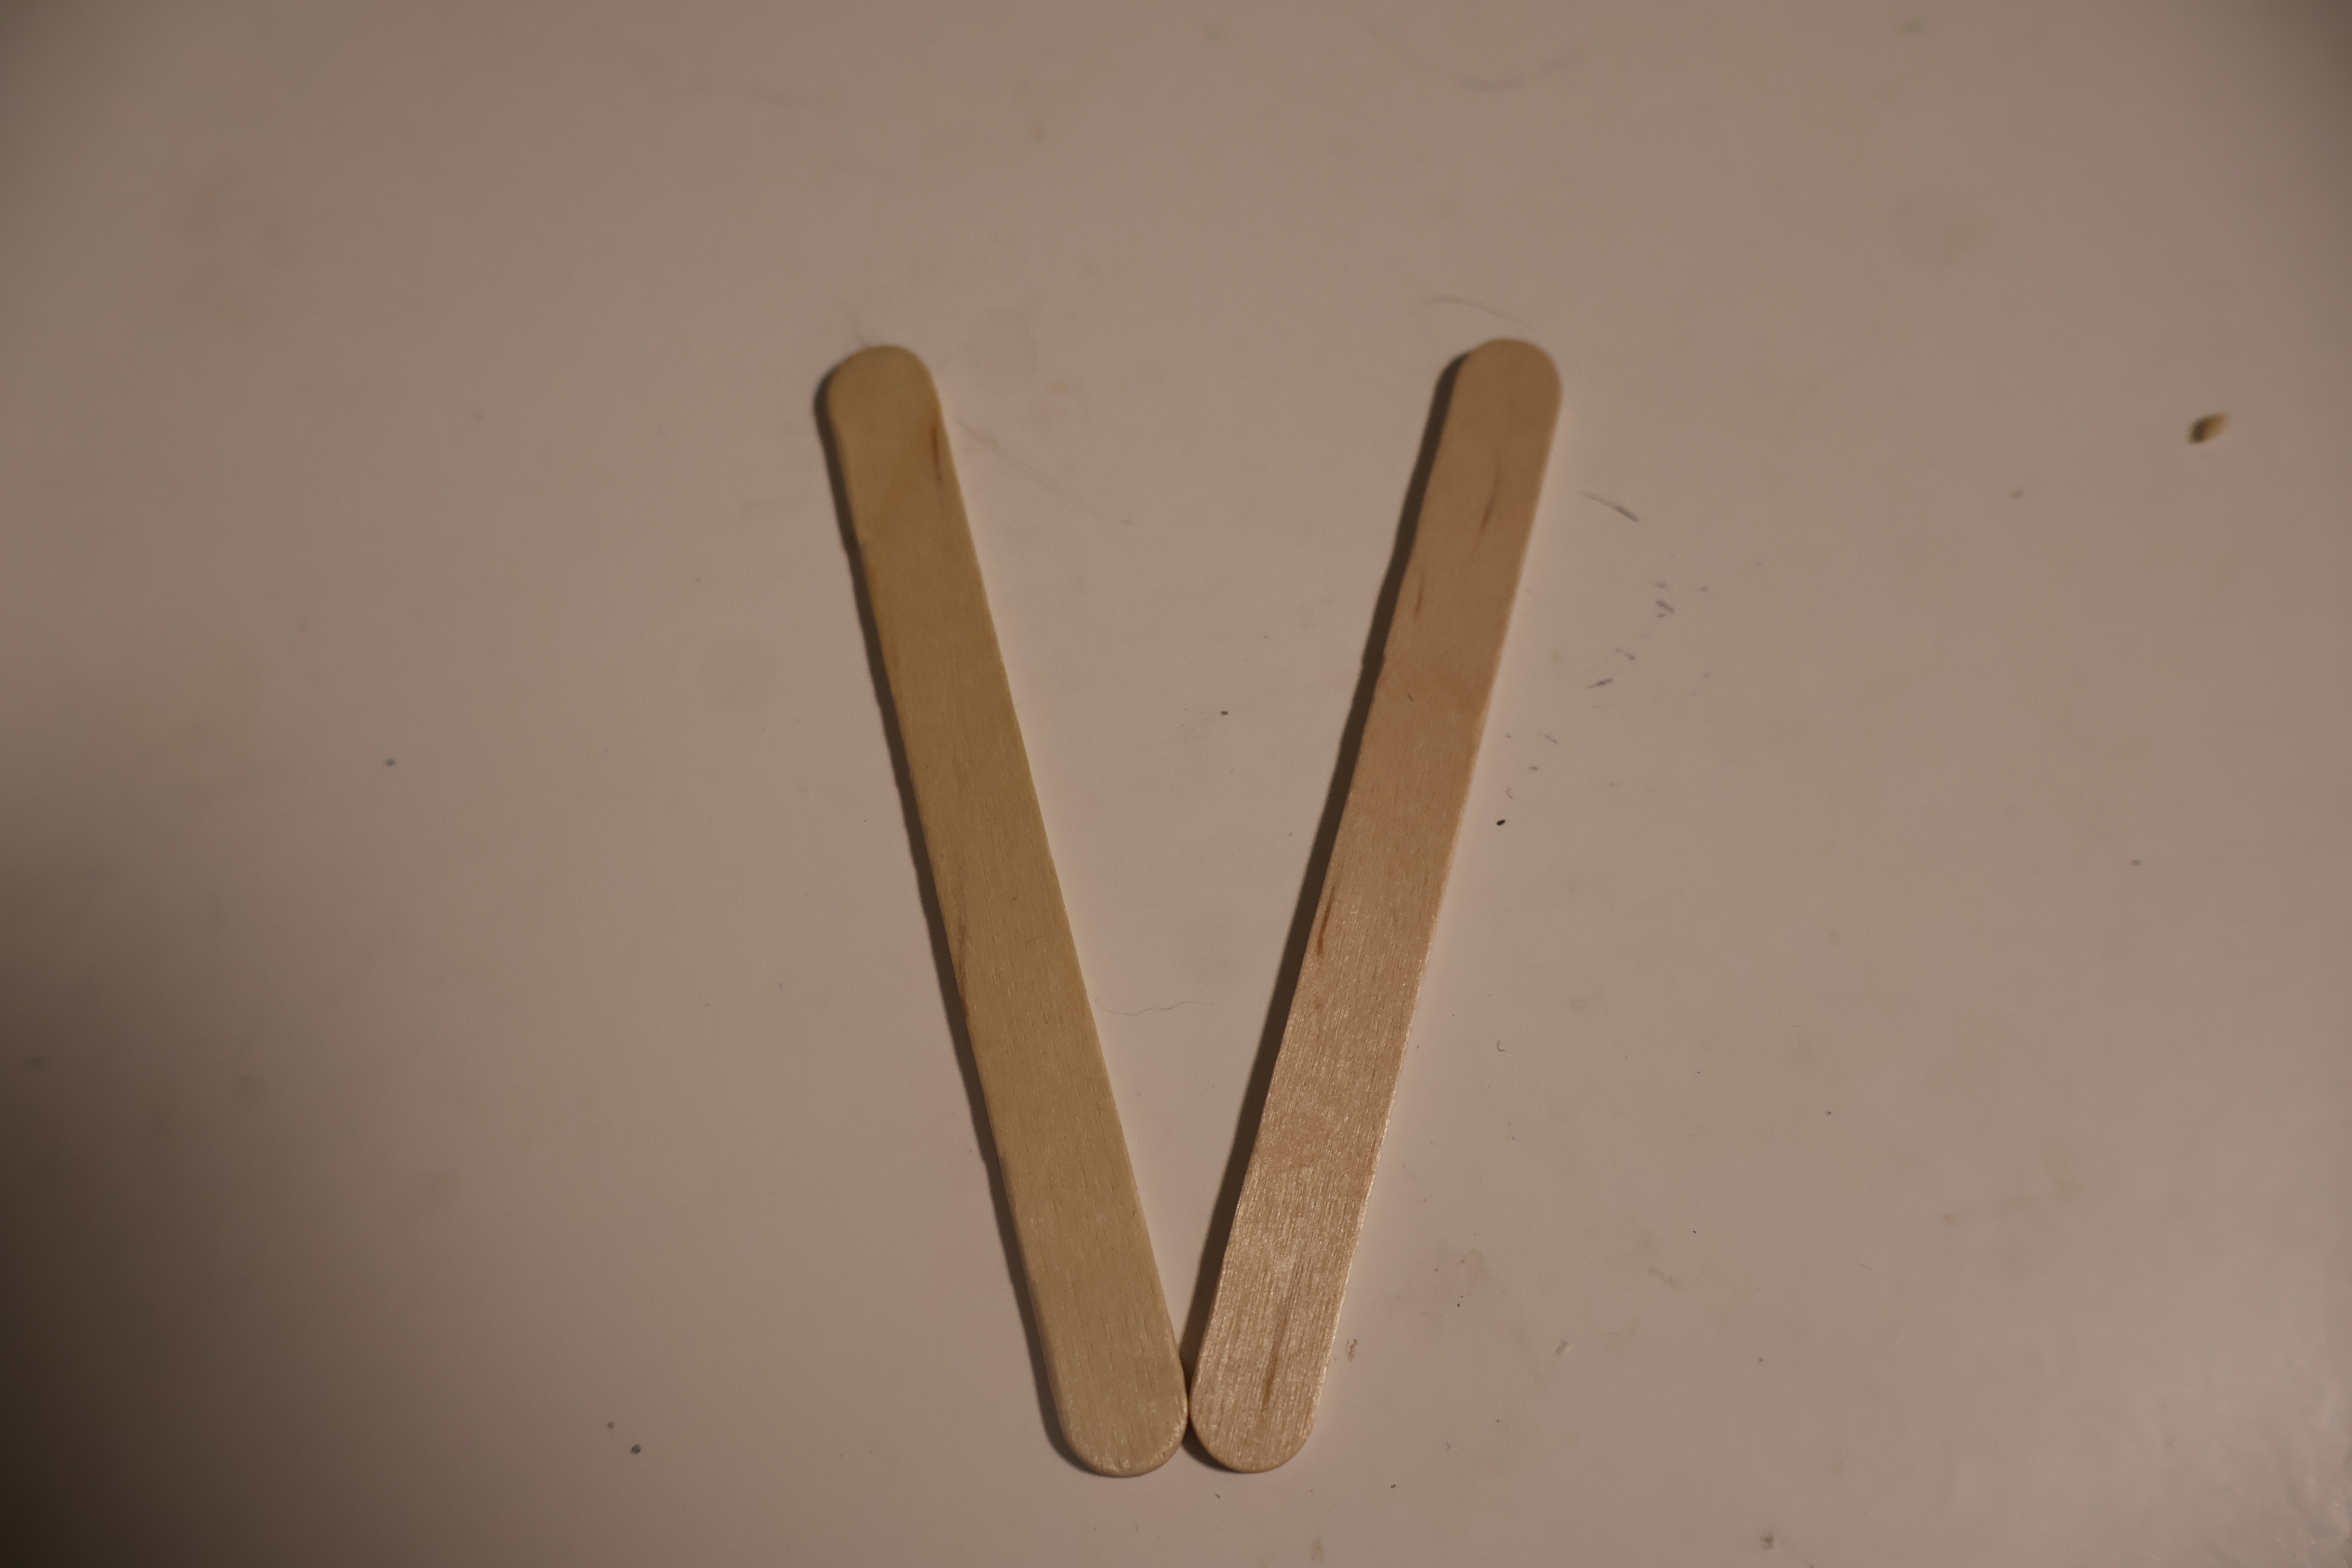
- Make a V shape with the two paddle pop sticks, making sure they are flat and the large part of the V is about 3 cm narrower than your longer skewer segments.
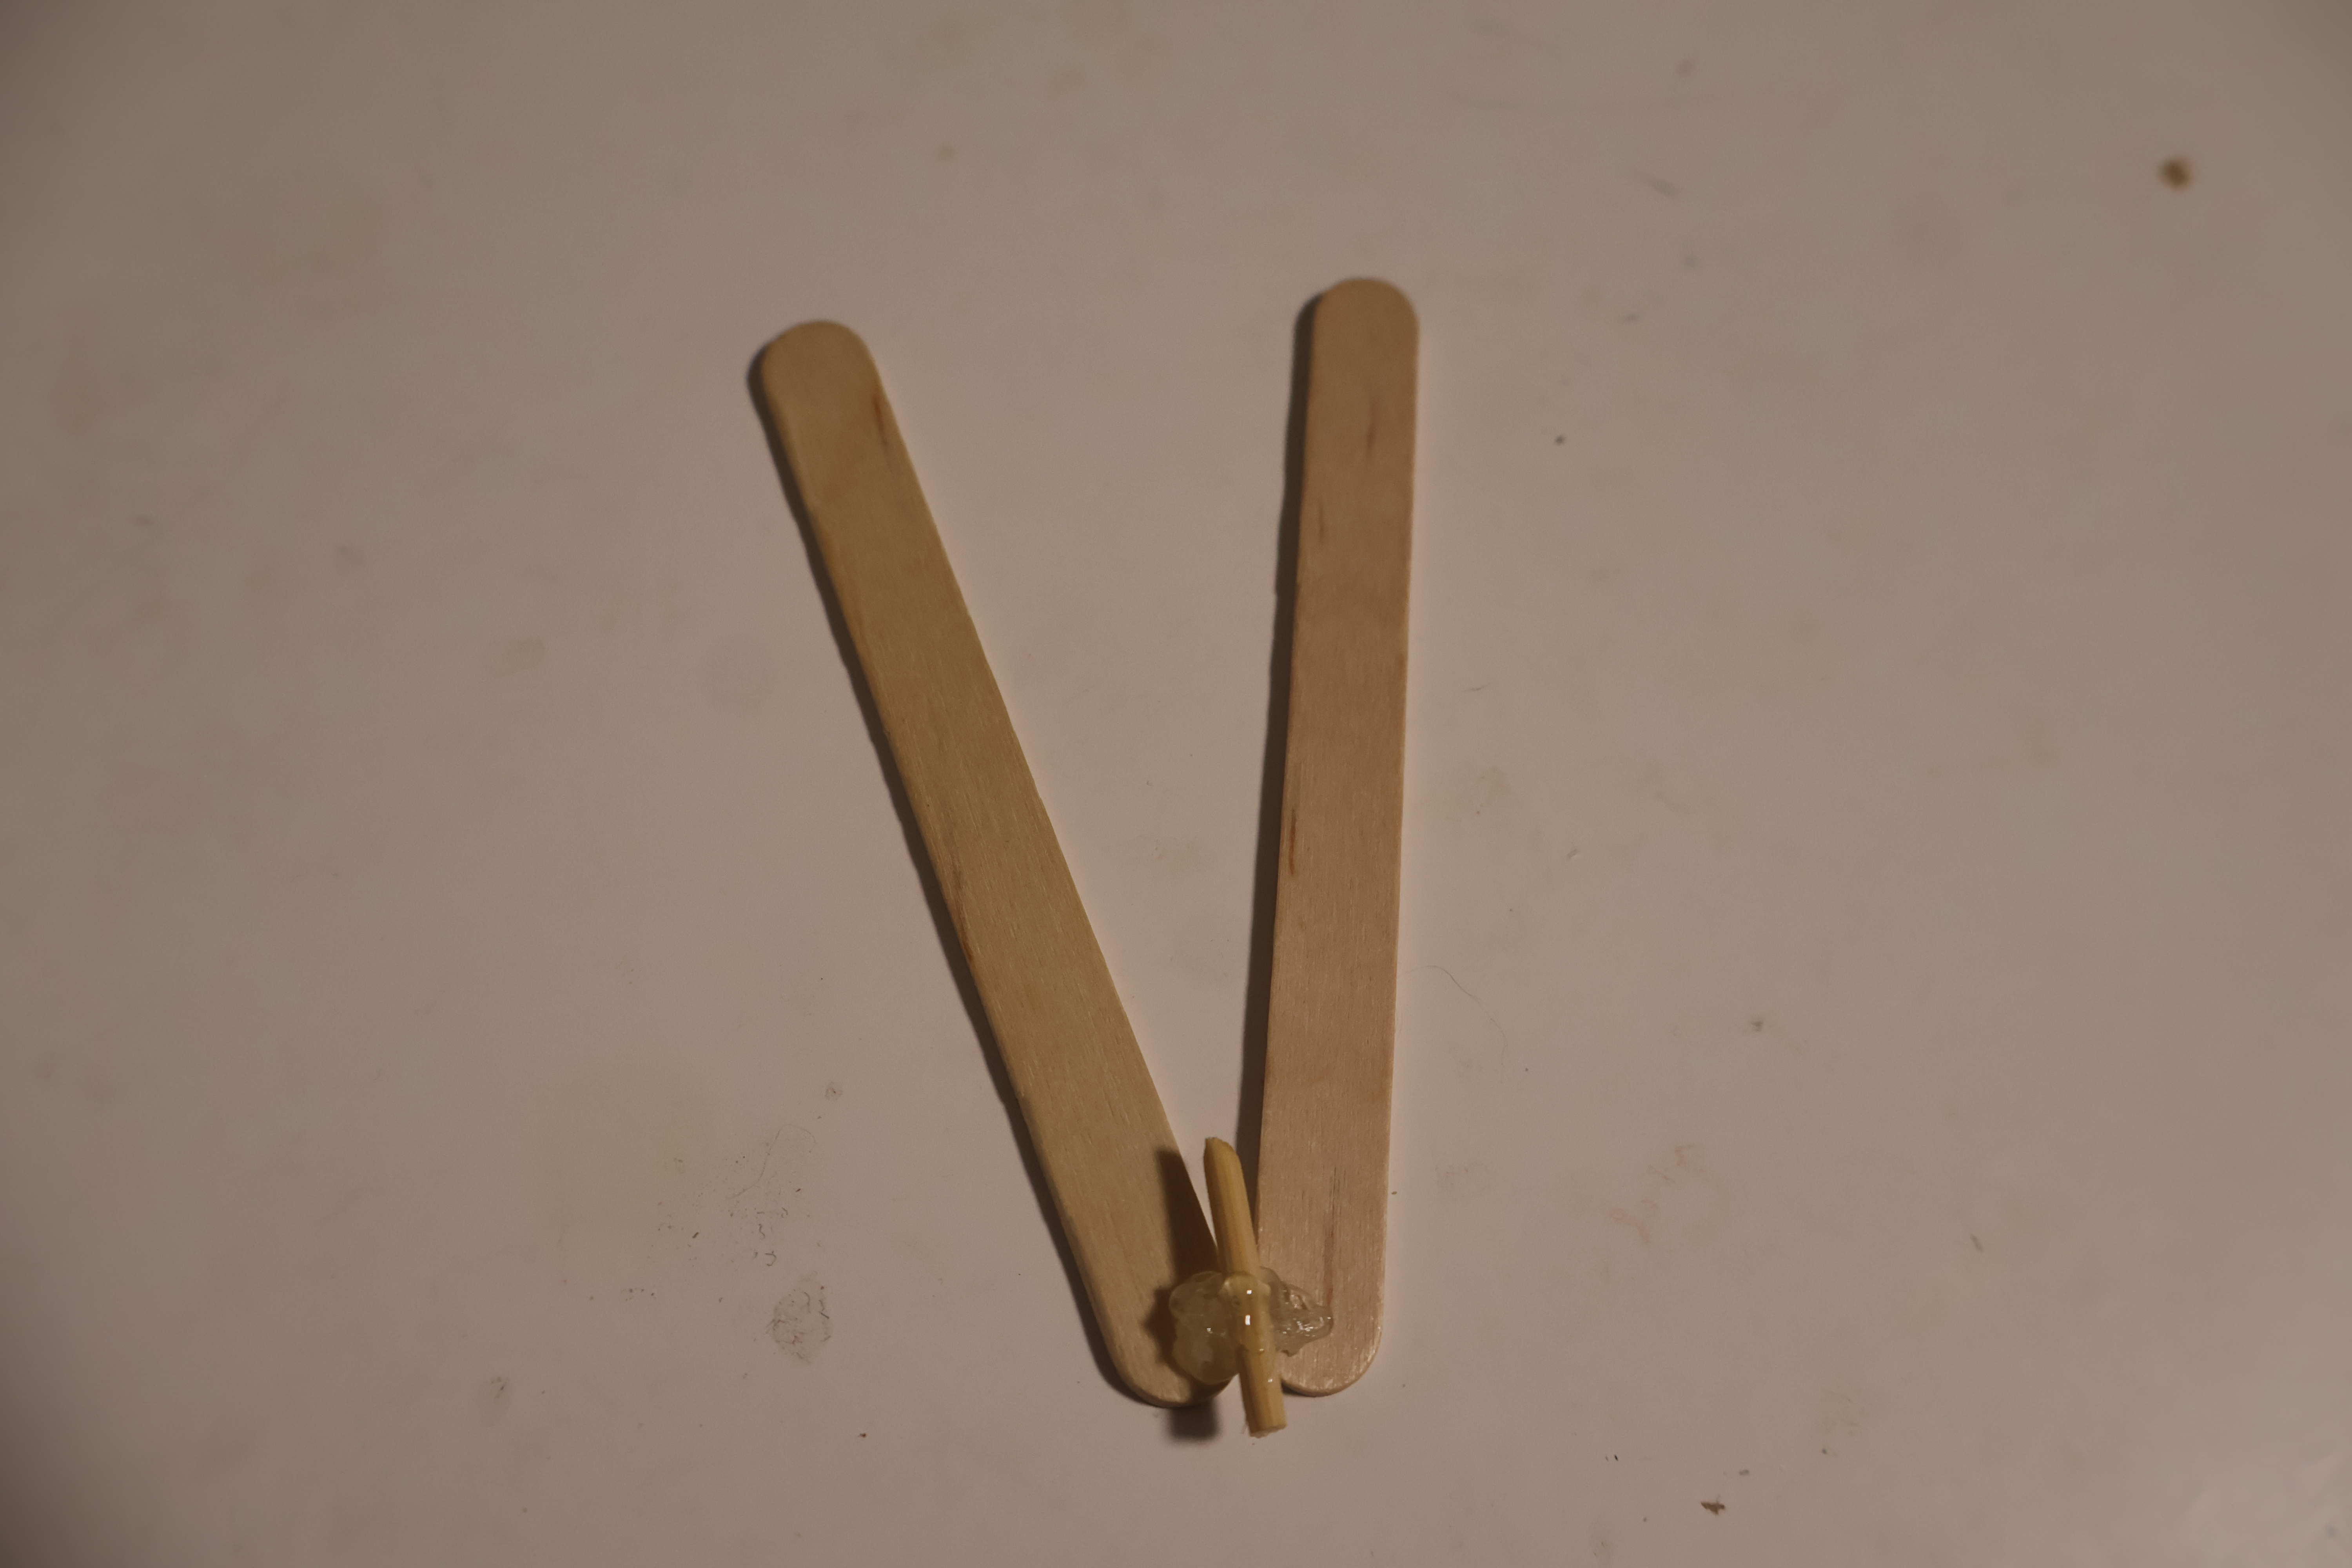
- Using a hot glue gun, glue the touching ends together and add one of the smaller skewer segments in the middle of the V, 90 degrees to the join. This will be the front of your car.
- Cut your straw into three pieces. Two pieces should be a bit wider than a popsicle stick and the third piece should be about the width of the large end of the V.
- Using a hot glue gun, glue the centre of the longer piece of straw to the point of the V and the two smaller bits to each of the other ends of the popsicle sticks.
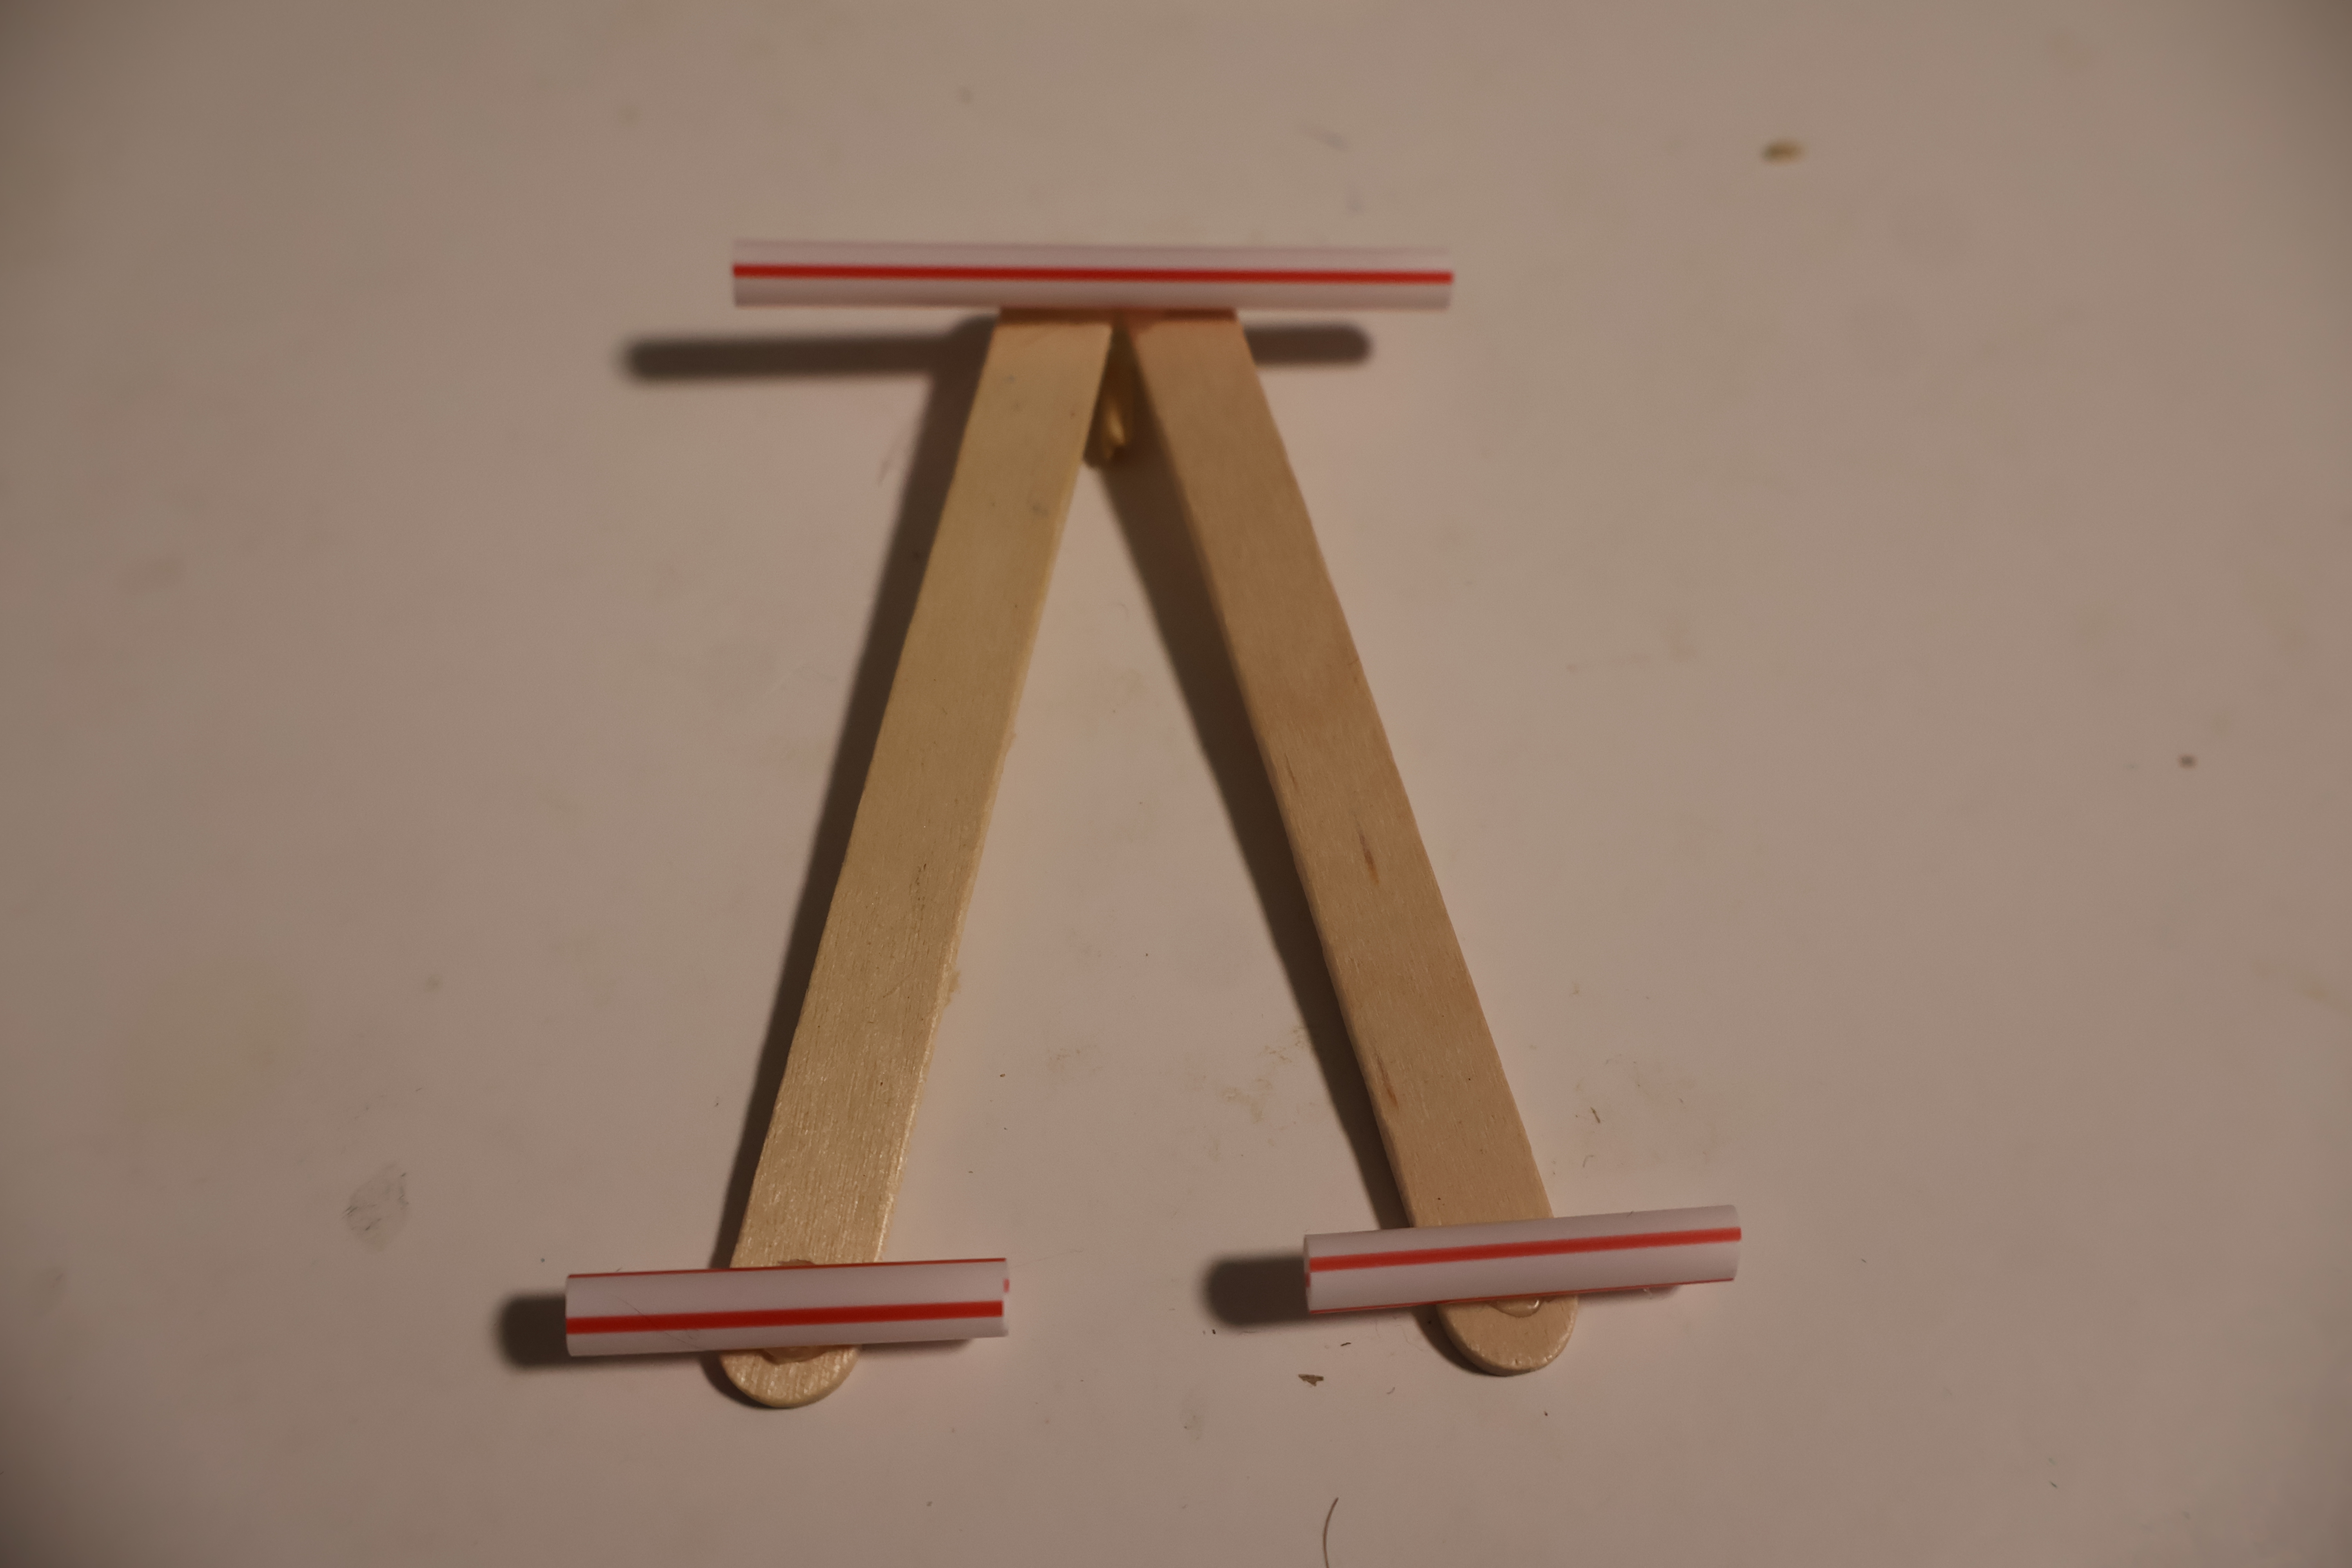
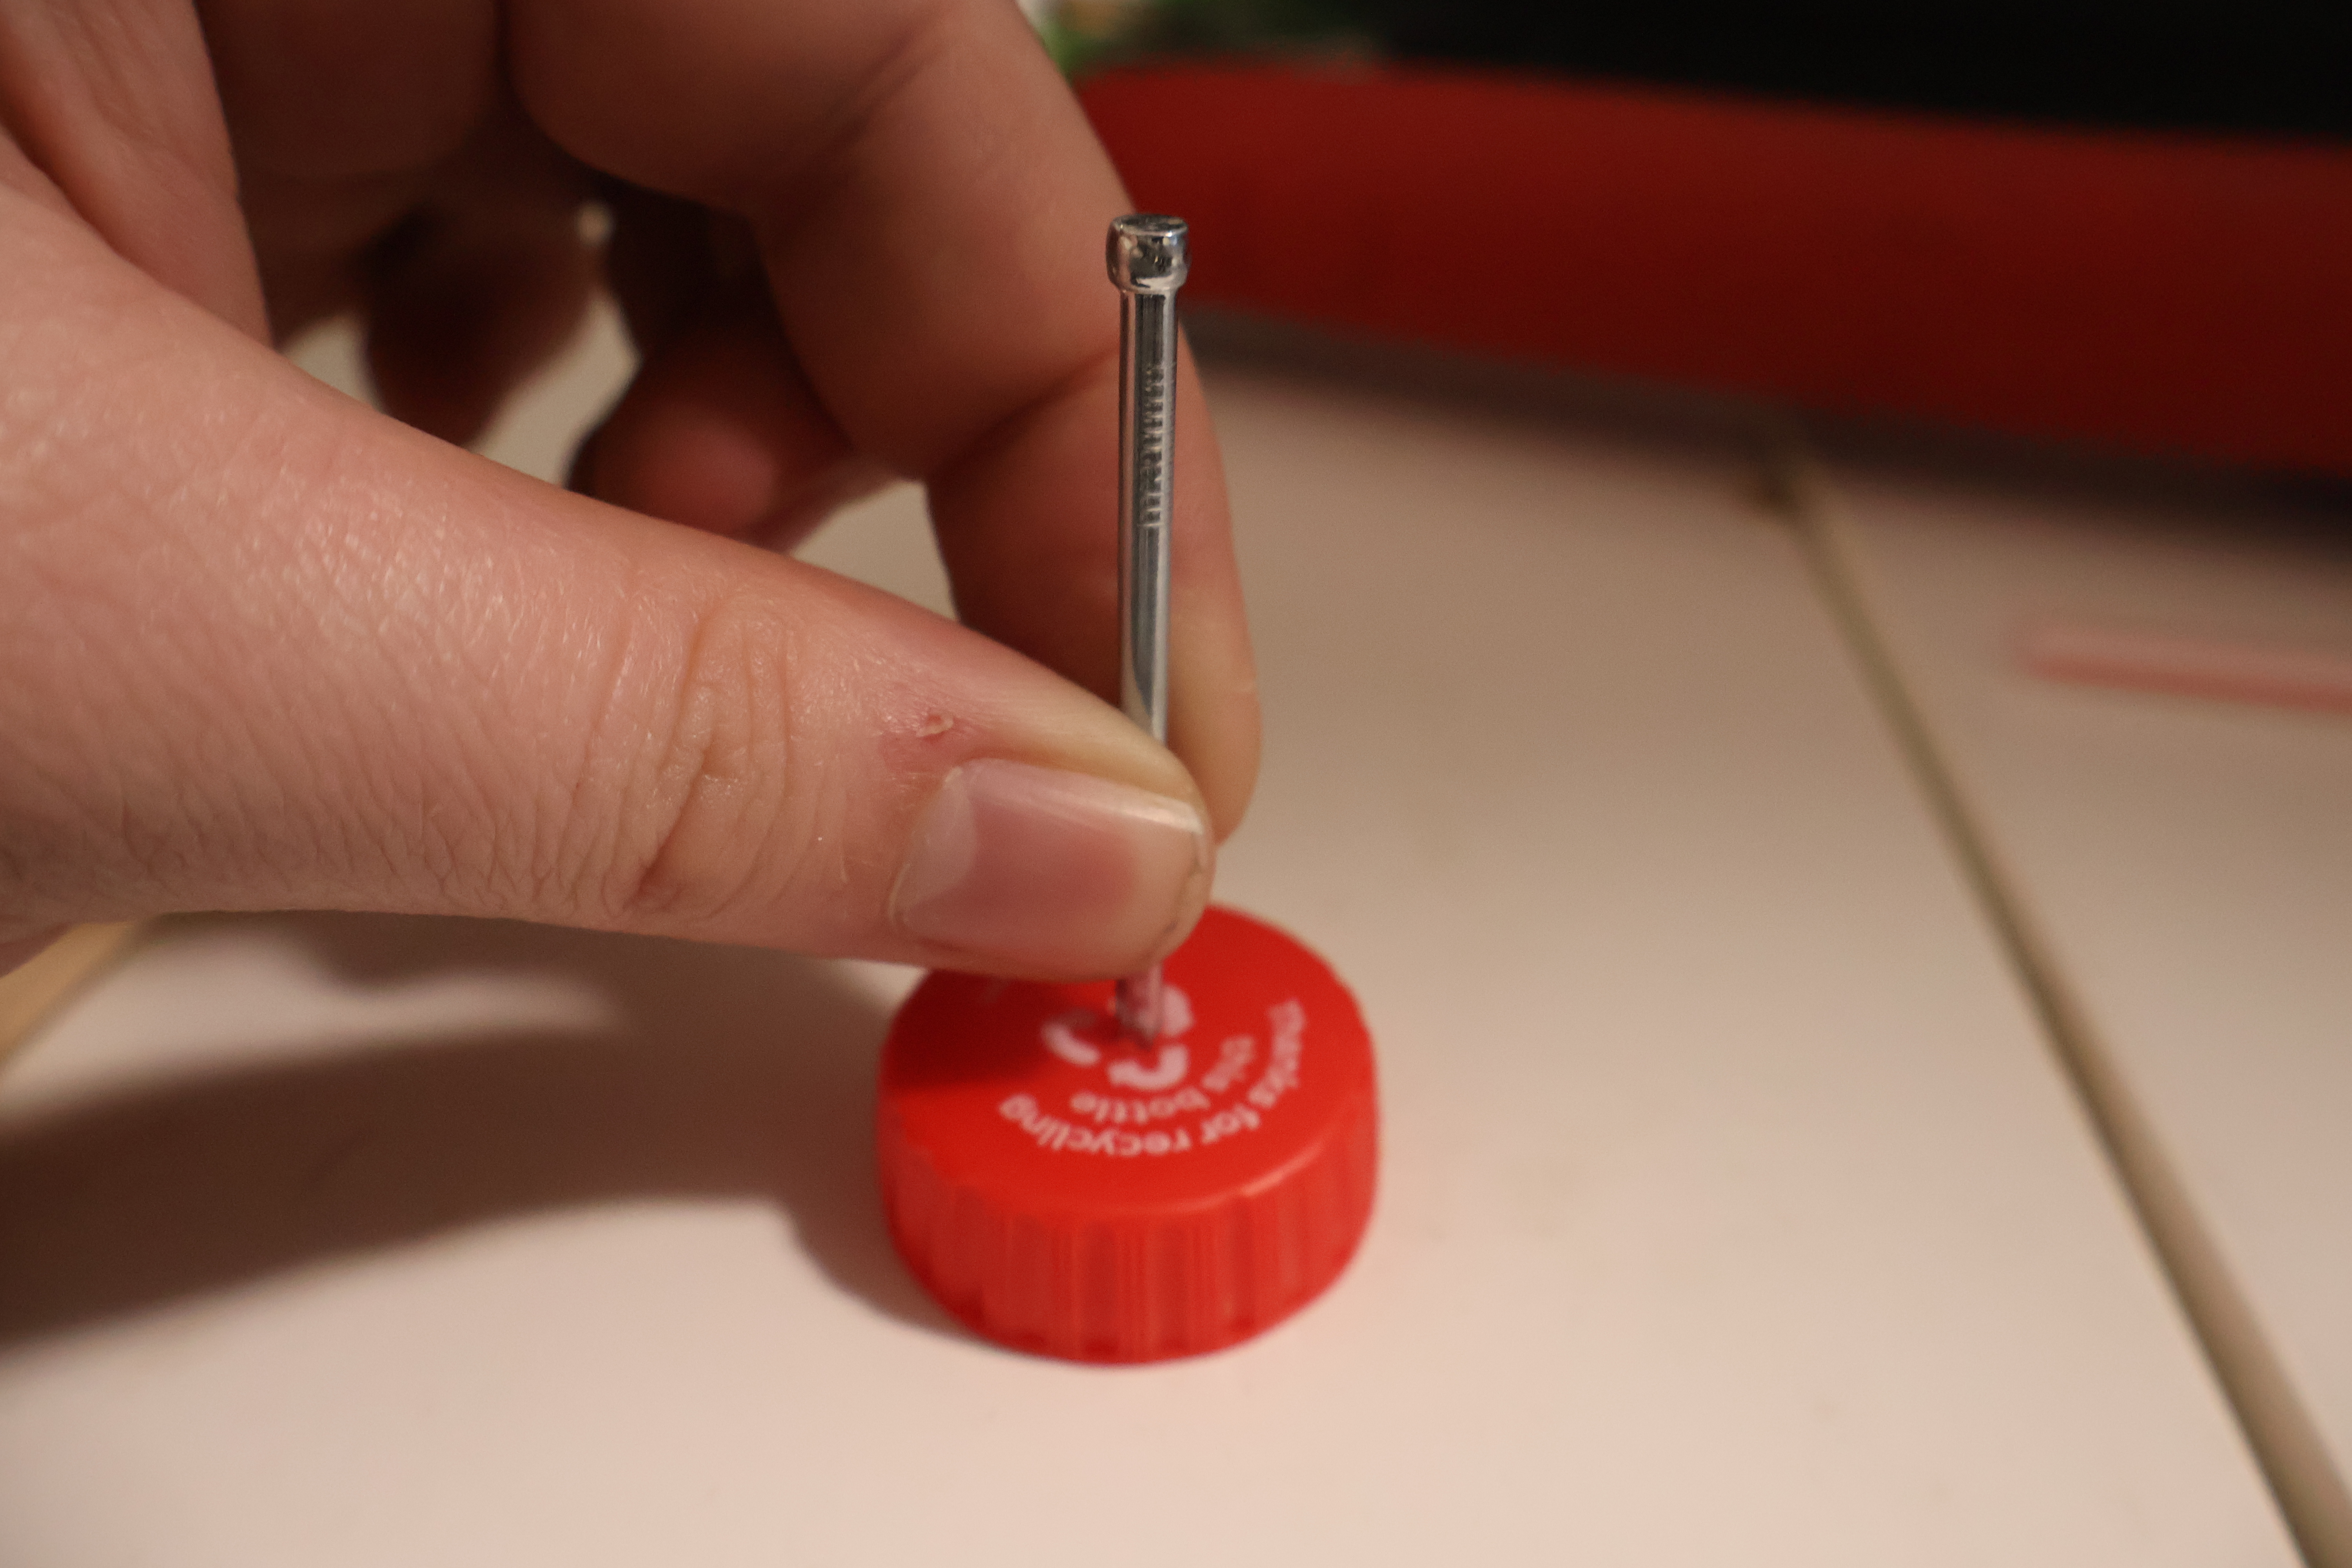
- Use a hammer and nail to create a small hole in the centre of each of the bottle caps. You may need an adult to help you with this.
- Carefully put one of the longer skewer segments through the hole in the centre of a bottle cap, with the open side of the bottle cap facing towards the shorter part of the skewer.
- Thread the skewer with the bottle cap through the two smaller straw segments at the wide end of the V so that the open side of the bottle cap is on the outside.
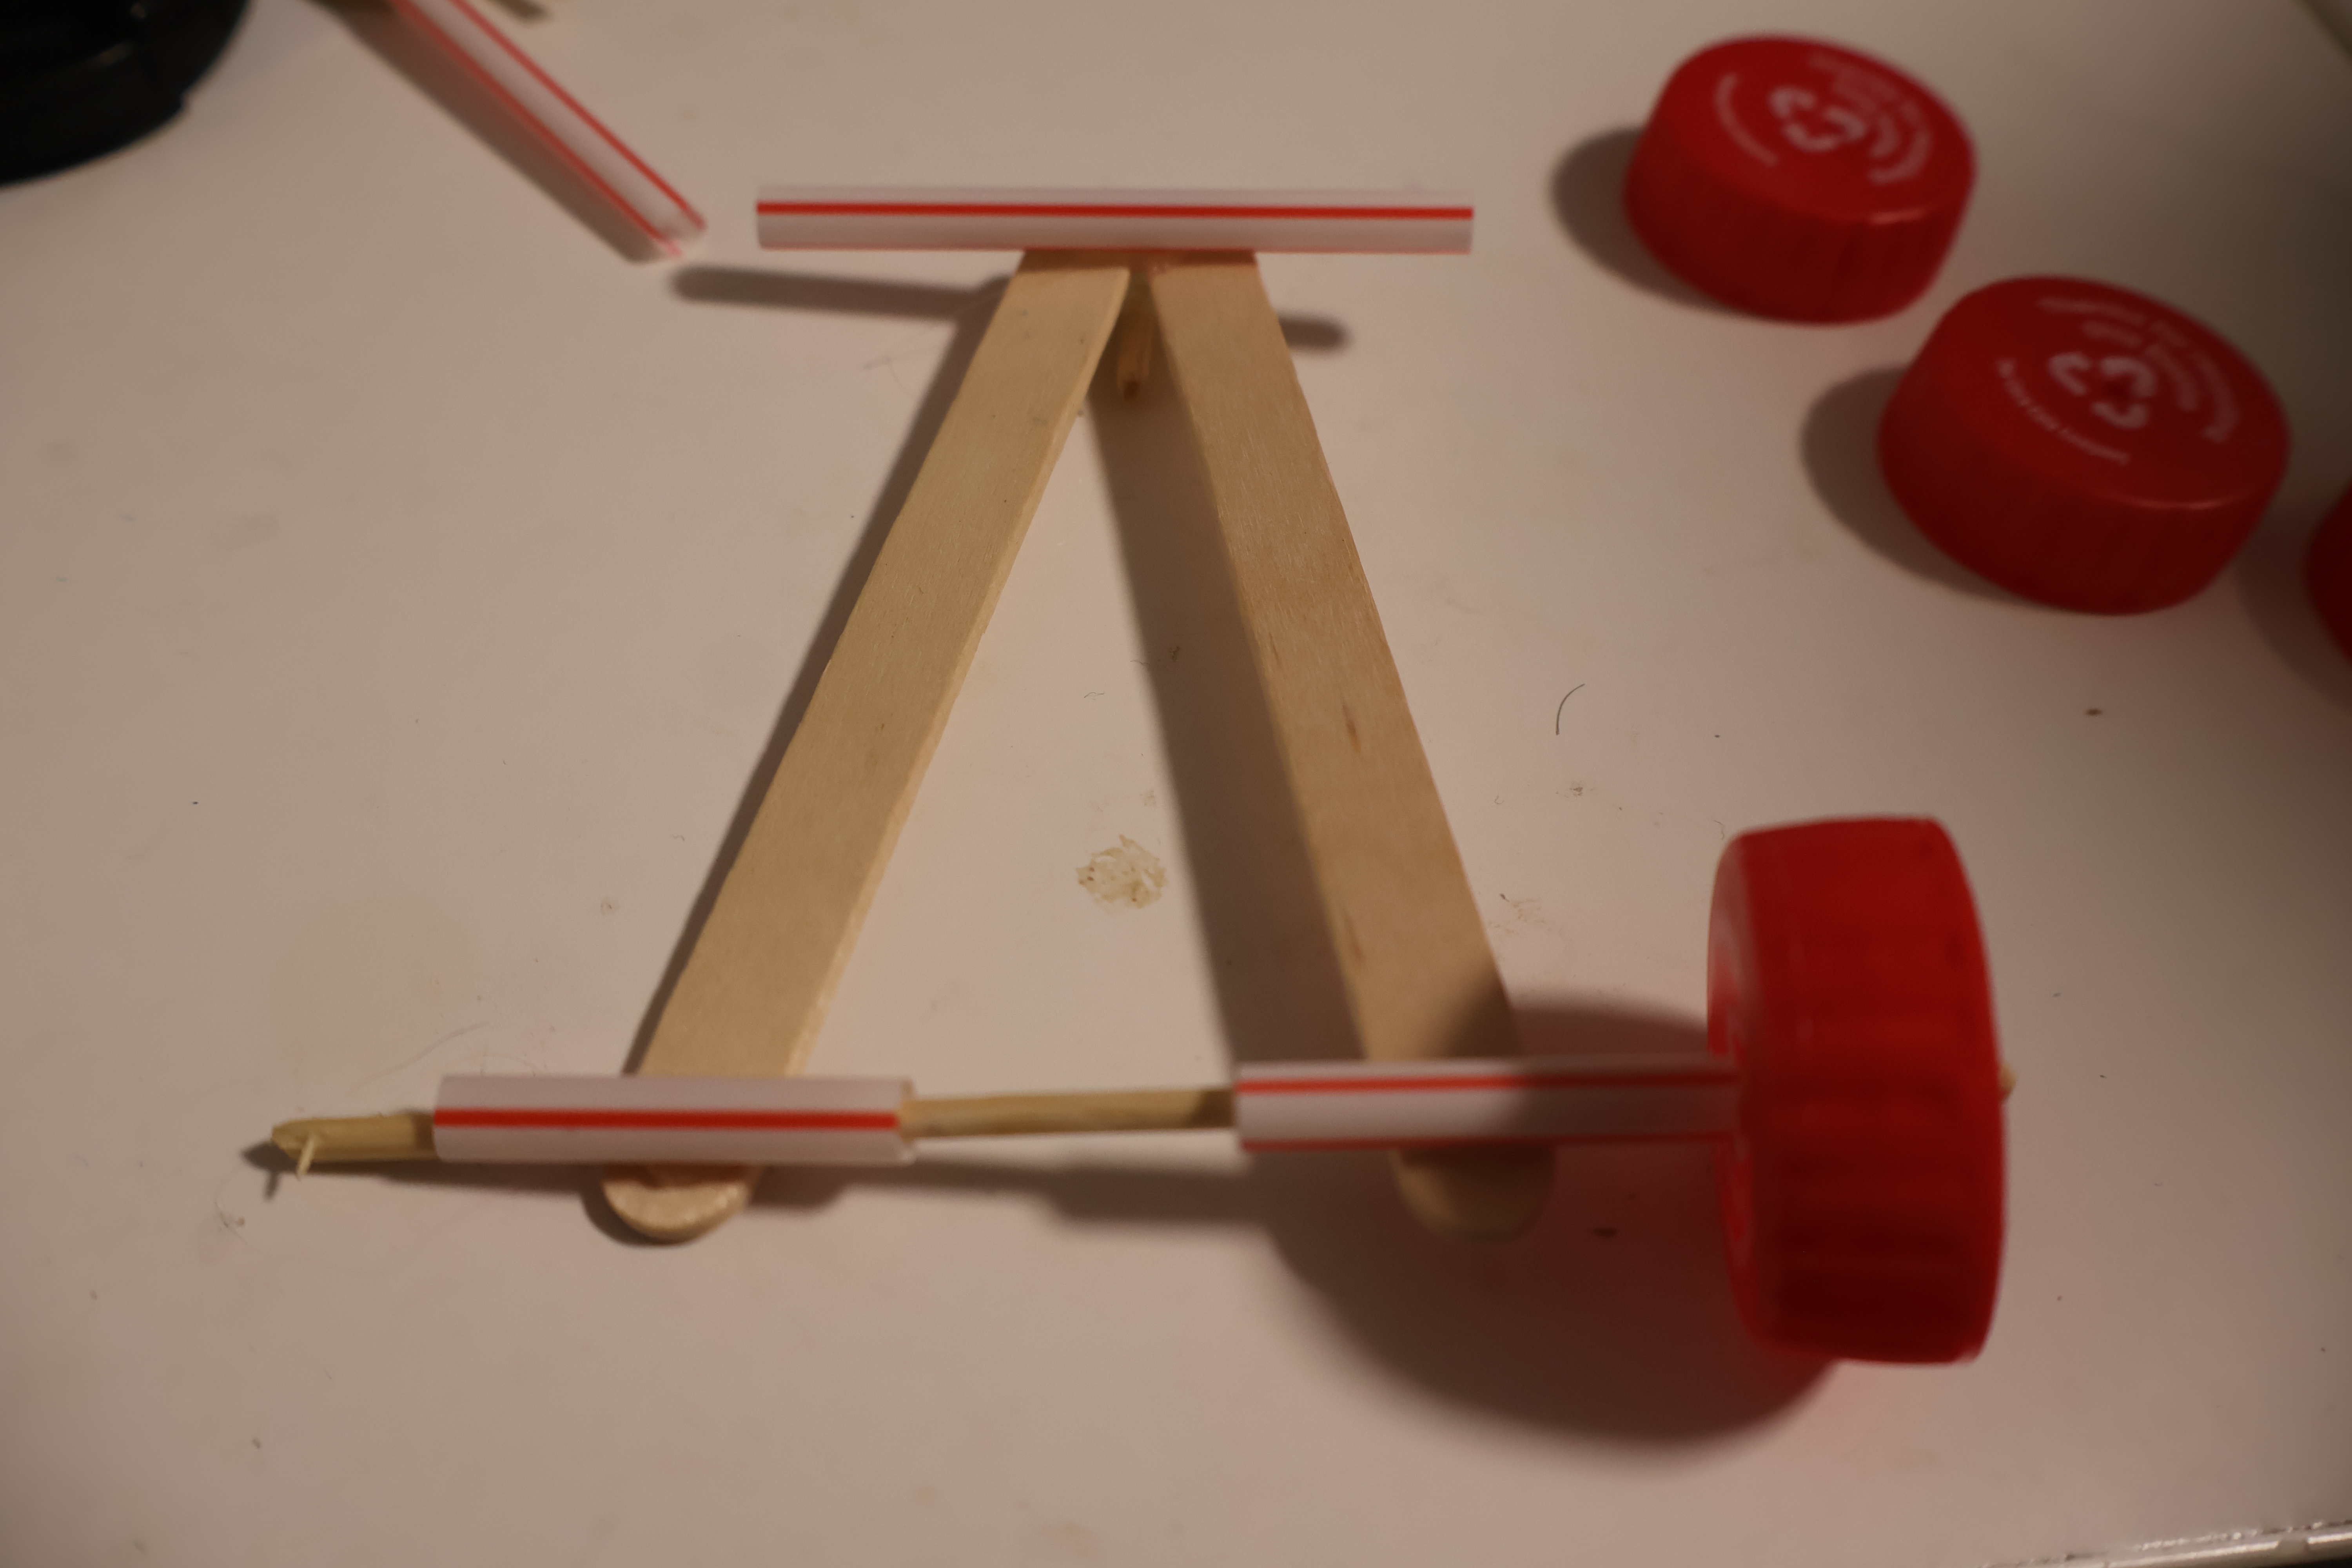
- Carefully put another bottle cap onto the other side of the skewer.
- Repeat with the other longer skewer segments and bottle caps, threading through the straw at the front of the car. The bottle caps should sit quite close to the ends of the straw.
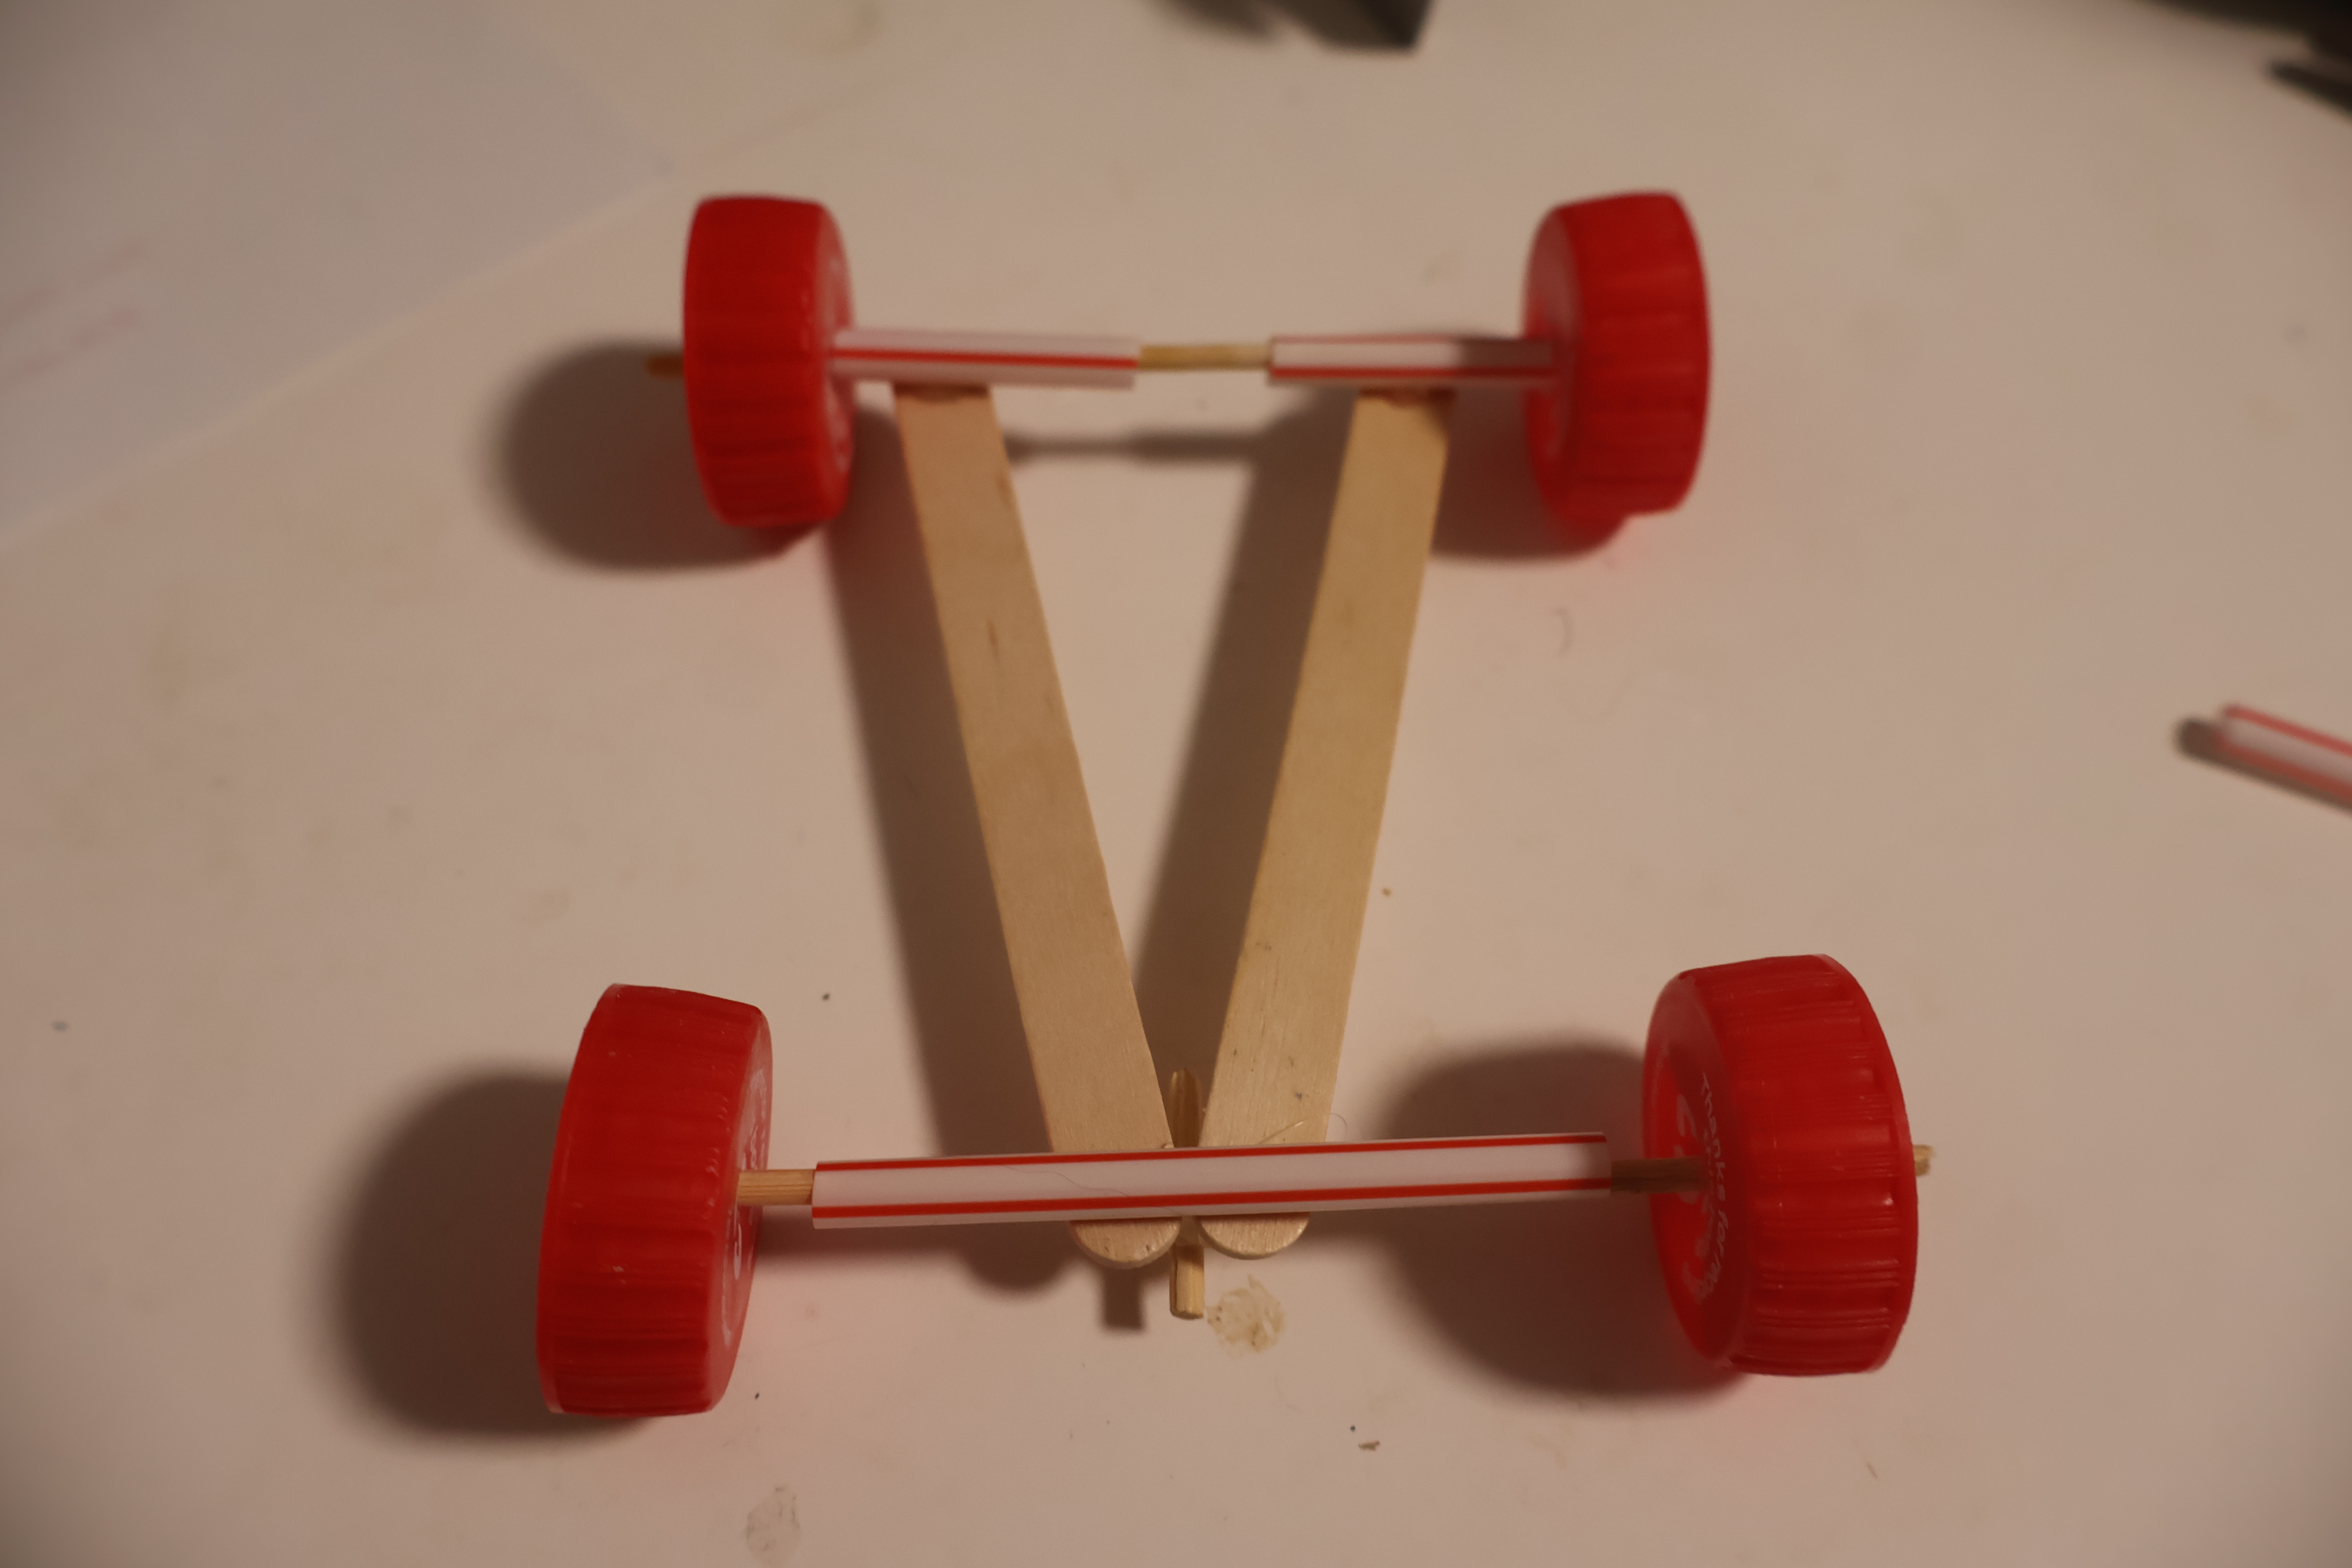
- Using a hot glue gun, secure the skewers to the bottle caps by gluing the skewers to the bottle caps on the inside of the bottle caps.
- Using a hot glue gun, glue the other short skewer segment in the middle of the skewer at the wide end of the V.
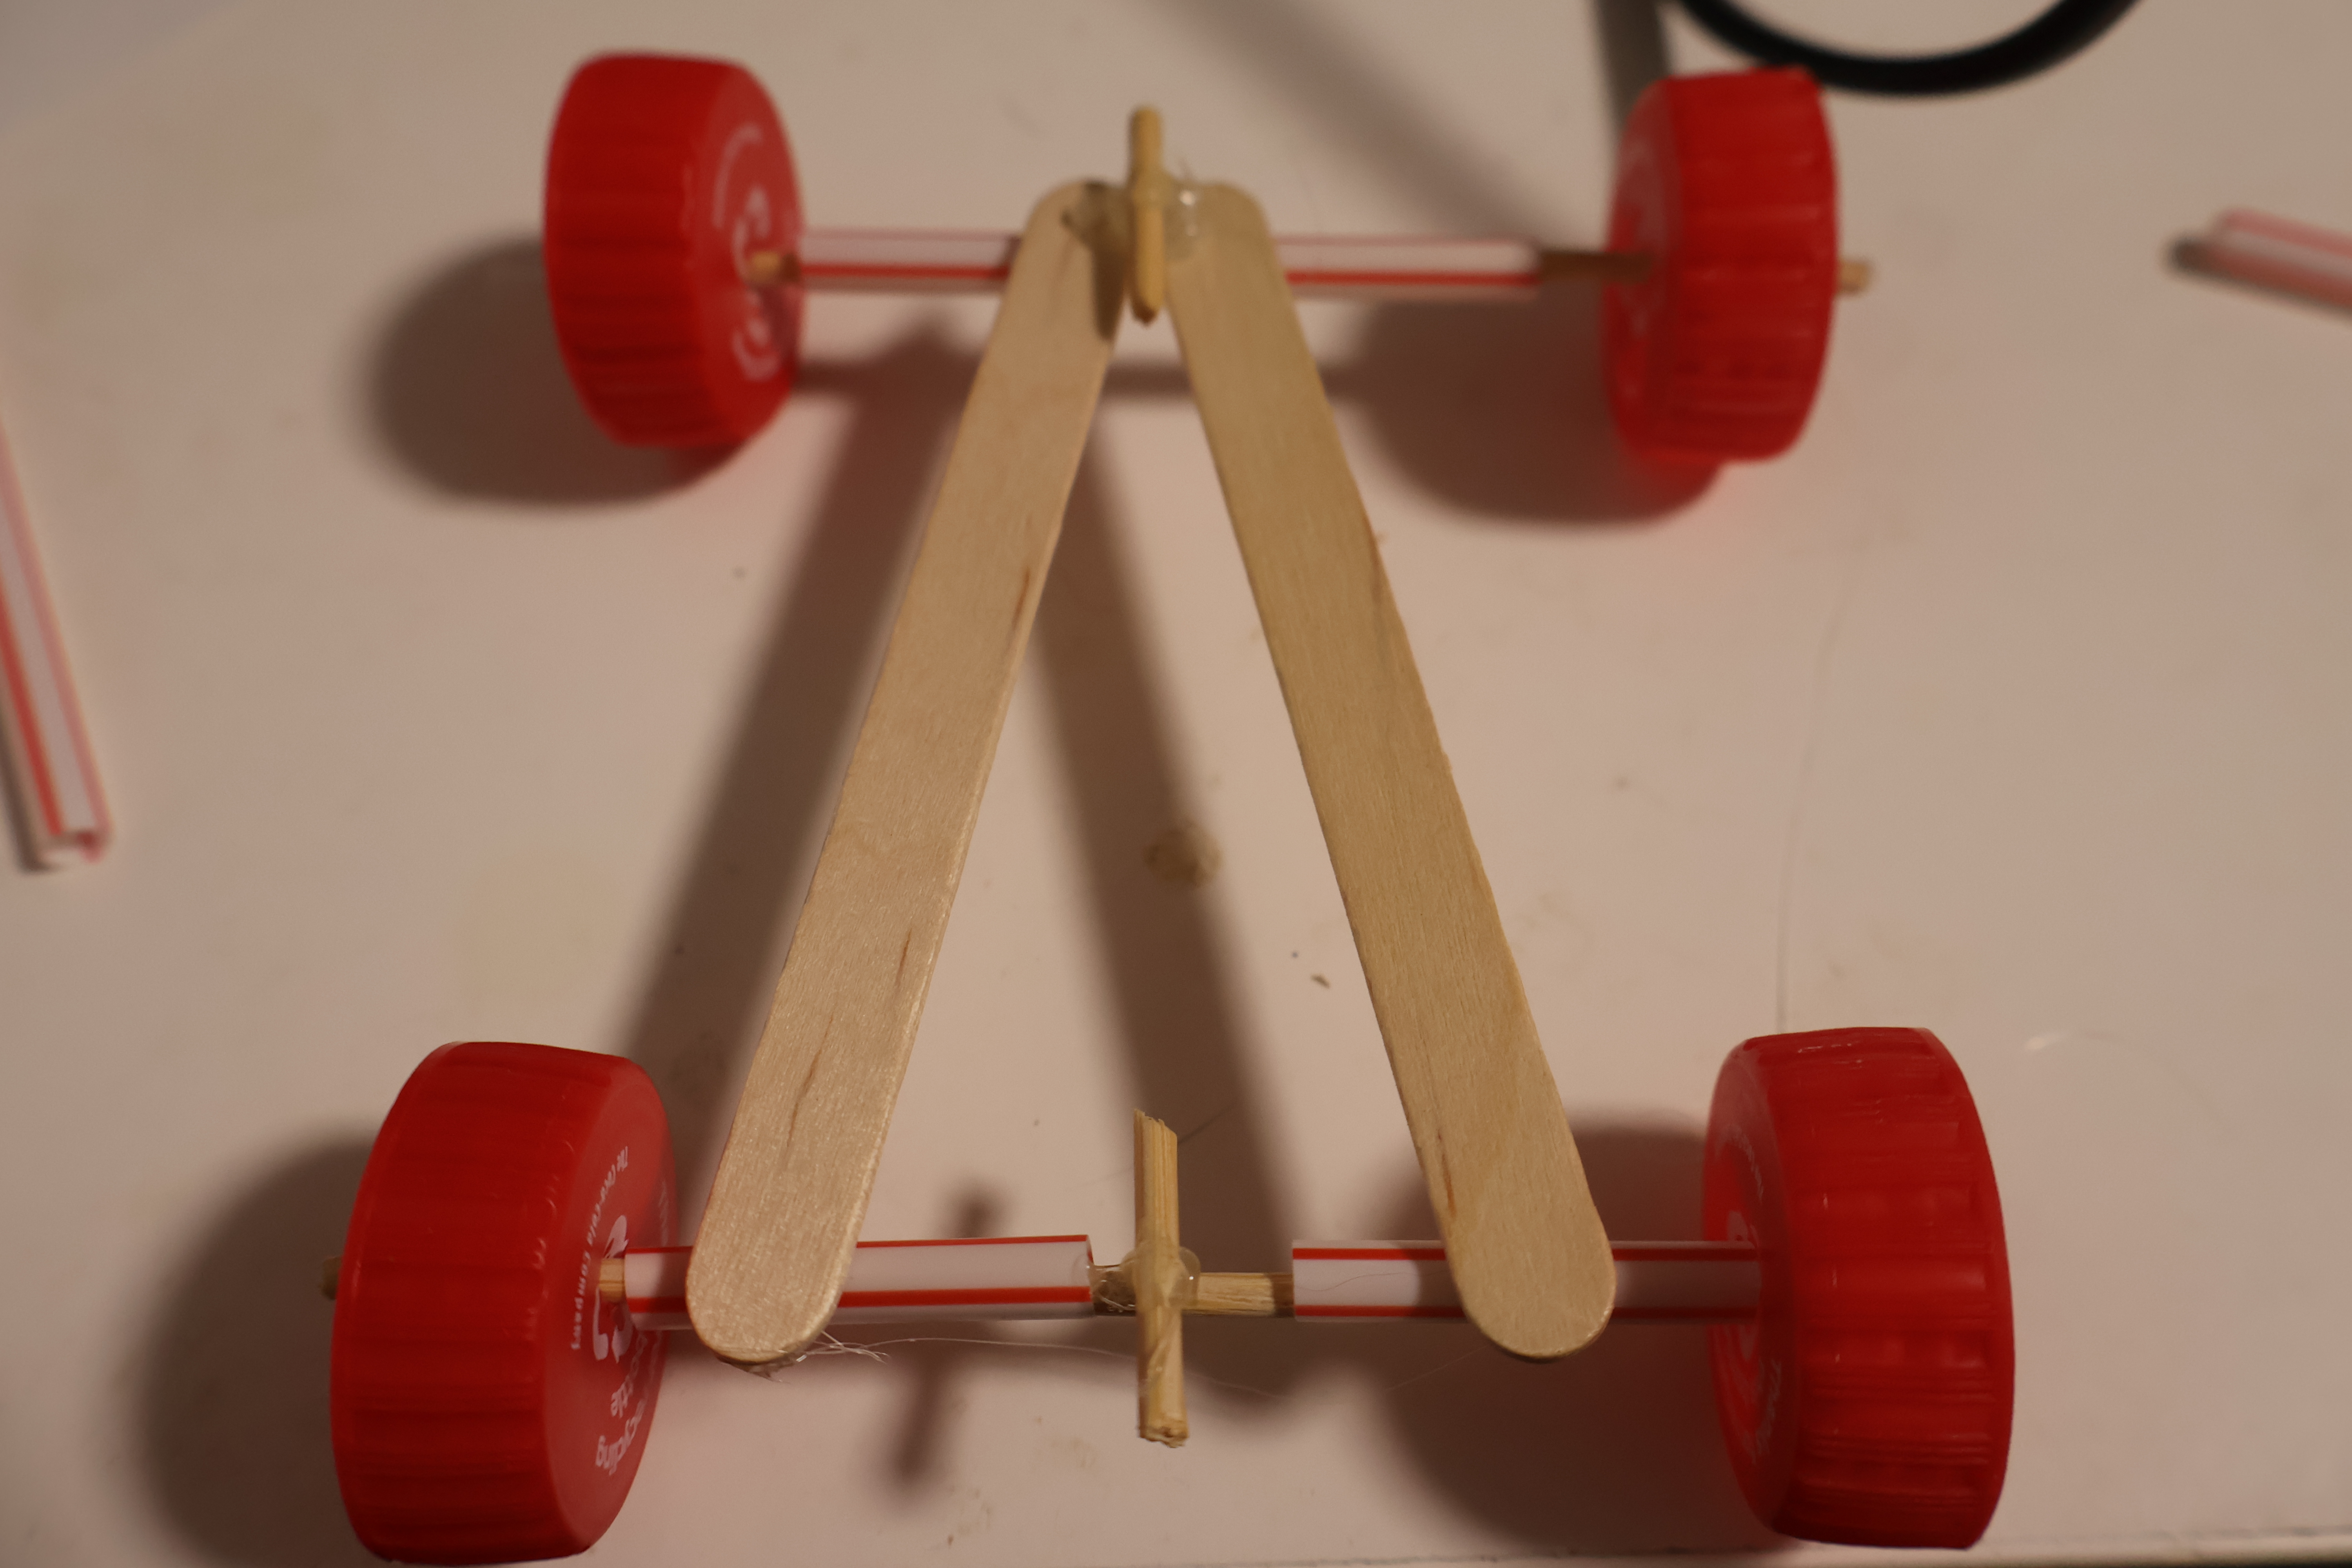
- Wrap each of the smalller rubber bands around each of the back wheels of the car. You may need to stick these to the wheels with a bit of hot glue.
- Loop the third (bigger) rubber band around the small skewer segment at the front of the car and secure it either with a knot or some hot glue.
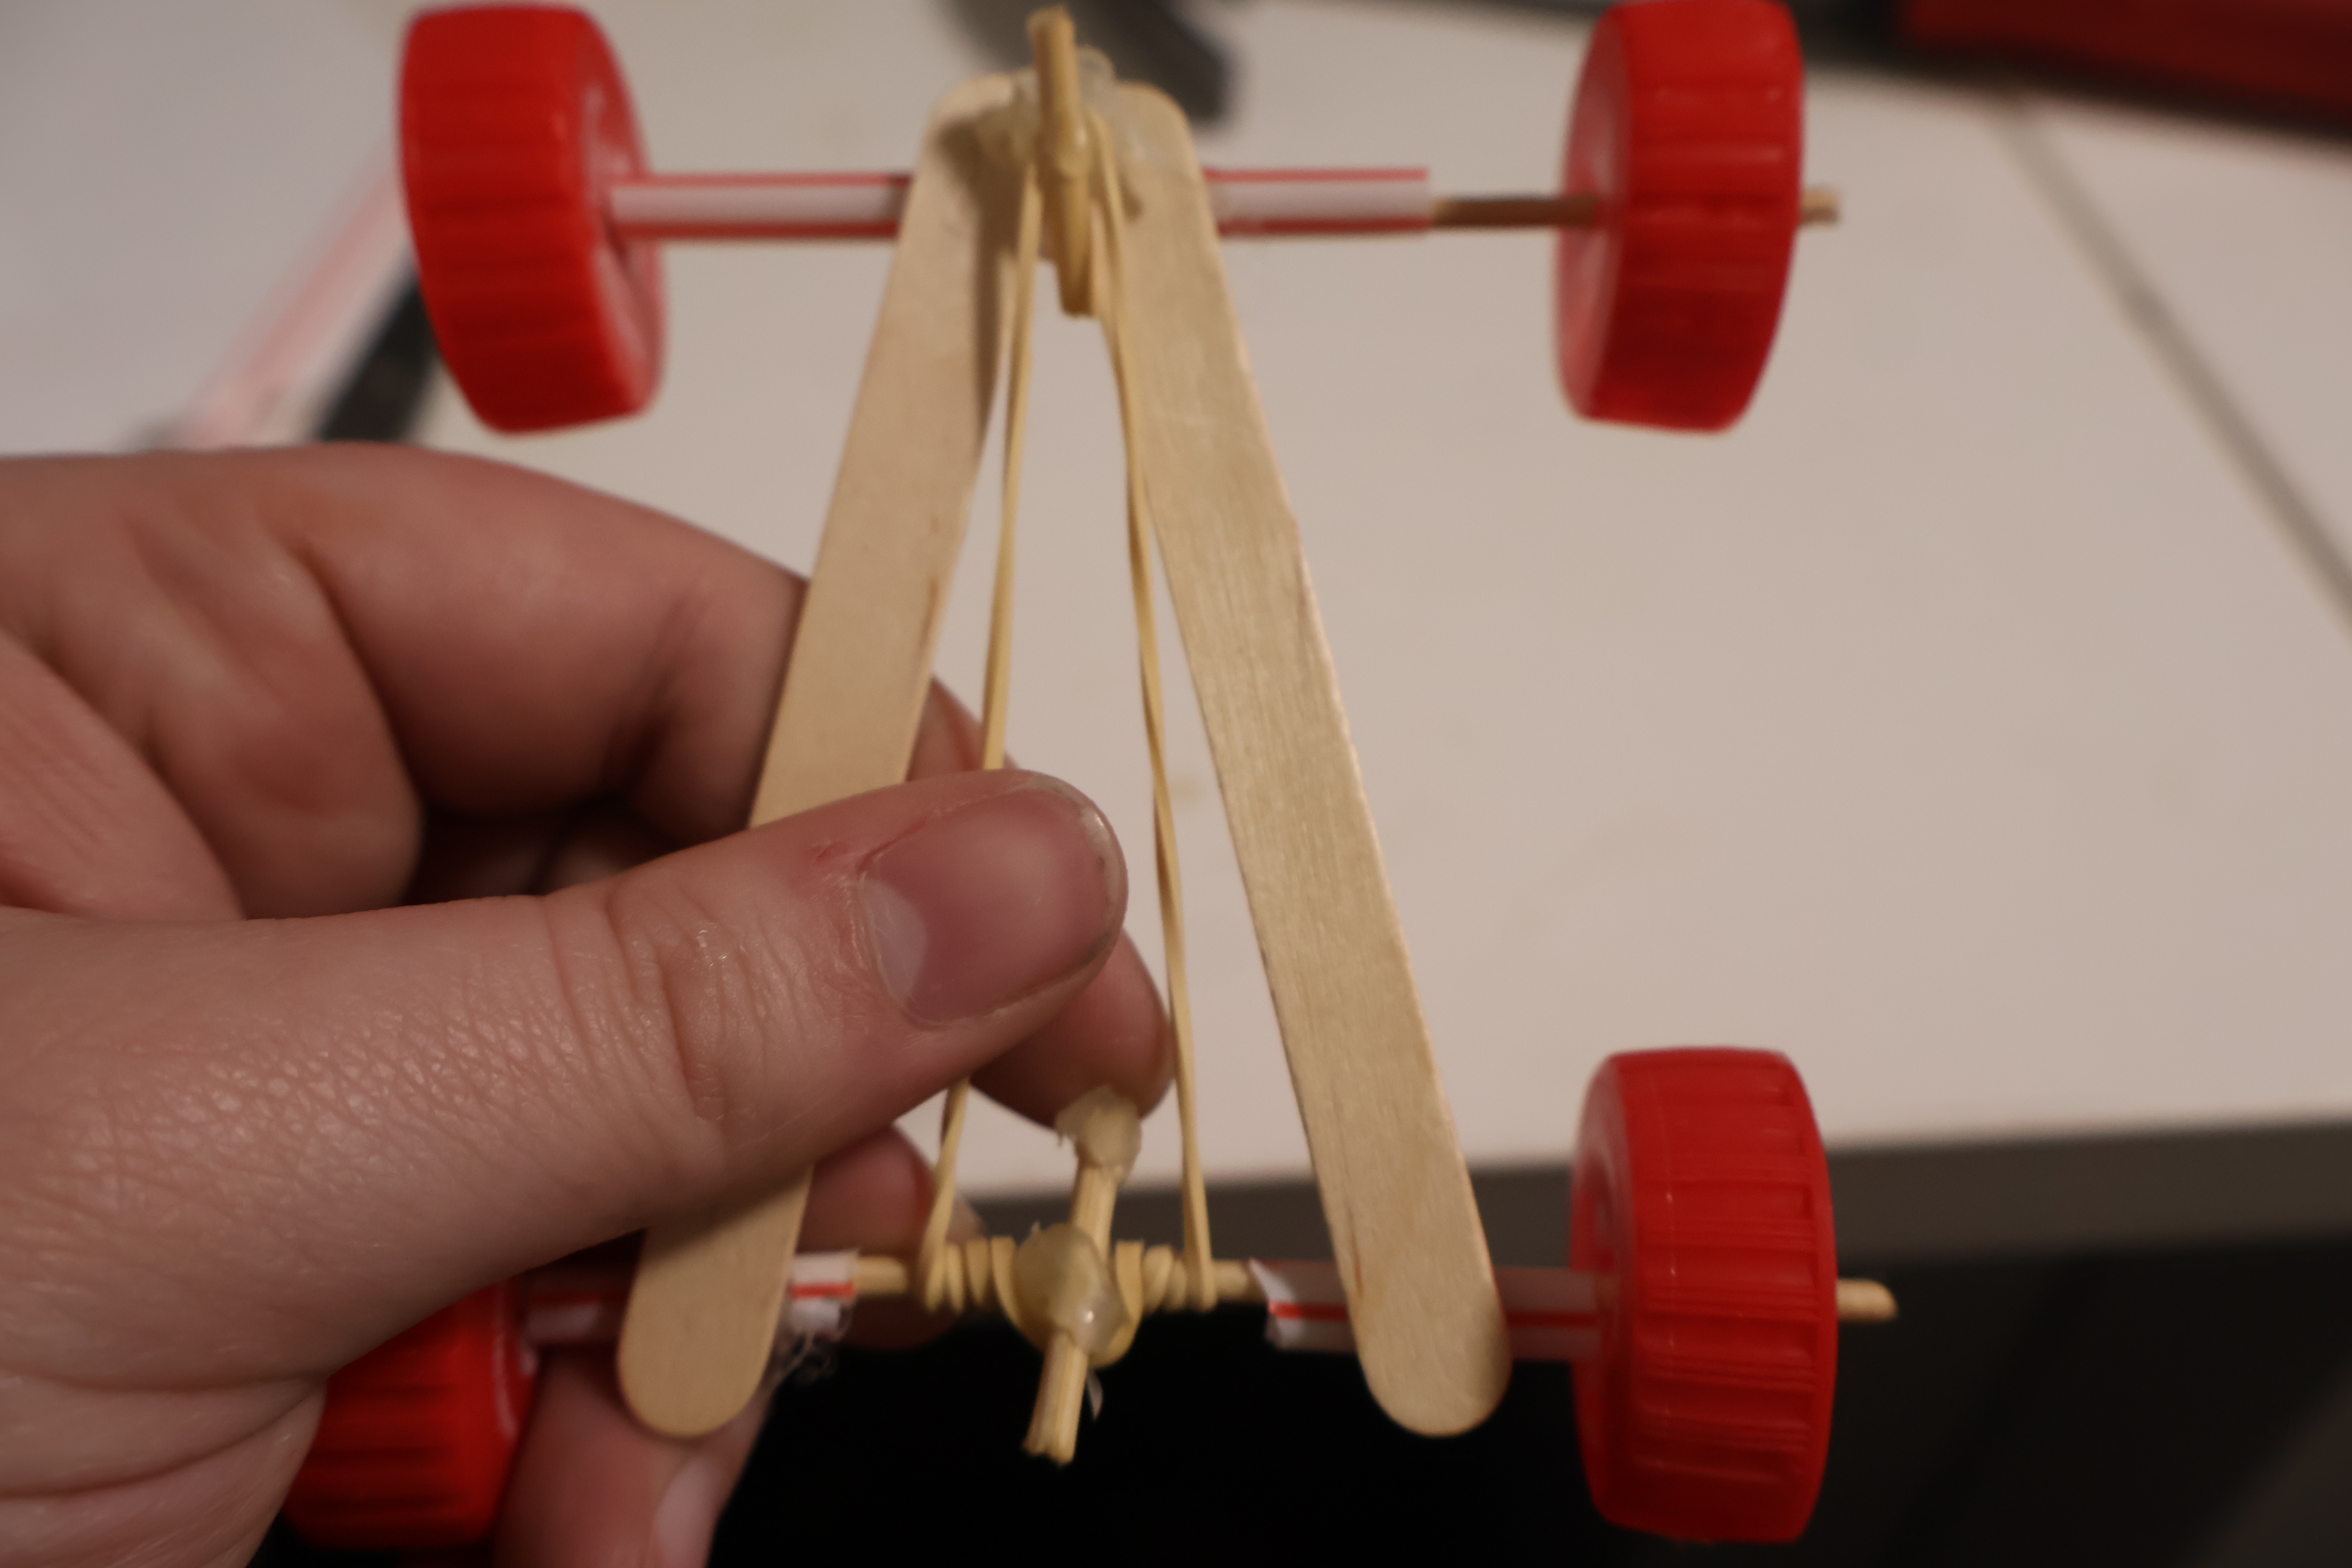
- Stretch the rubber band to loop it around the small skewer segment at the back of the car and carefully rotate the back wheels backwards.
- Place your car on a flat surface and let it go.
Instructions for easy printing can be found here.
Review
- Did you successfully get your car to go? If not, what do you think went wrong?
- What could you do differently to improve your car?
- What did you enjoy most about making your car? What did you learn?
- Do you think are different frame or different materials would impact the effectiveness of the car?
- What do you think would happen if you used a larger rubber band to power the vehicle or looped two rubber bands together to power the car?
Safety
- Sharps risk: This activity uses scissors and therefore presents a risk of cuts. Care and appropriate adult supervision should be used. For younger Sections, pre-cutting of some of the pieces should be considered.
- Burns risk: This activity uses hot glue which may present a risk of burns. Care and appropriate adult supervision should be used.
- Allergy risk - Latex: This activity uses rubber bands which contain latex and may present a risk to those with latex allergies. Individuals should be made aware of this and appropriate measures should be taken to minimise contact if an individual is allergic.
- Be careful with rubber bands as if looped too tight onto limbs, etc, they can impair circulation. Rubber bands can also be used as projectiles that, if not careful, may pose a danger to eyes. Never shoot a rubber band in the direction of someone else.
- Be careful when using hammer and nails as this can cause injury. Depending on the Section, consider having an adult perform this step.
- Paddle pop sticks and skewers - especially when cut - can present the risk of splinters.
Variations
- Have a challenge to see who can make a rubber band car go the fastest or furthest.
- Experiment with different car designs.
- Add an extra challenge by making the car have to carry something.